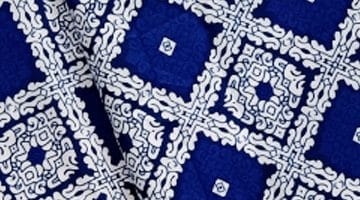
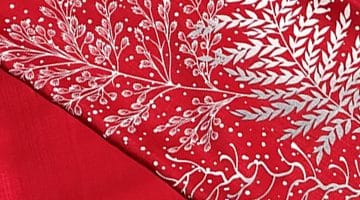
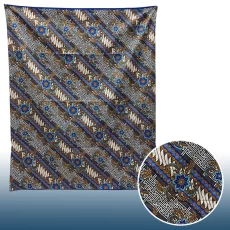
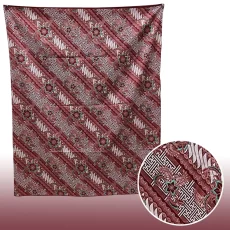
Kain batik is a traditional fabric that has been a significant part of Indonesian culture for centuries. This fabric is popular in many Southeast Asian countries, and it is known for its intricate patterns and vibrant colors. Kain batik is made by applying wax to fabric and then dyeing it, which is a time-consuming process, but the end result is well worth it. In this guide, we will cover the steps to make kain batik.
Materials Needed
- Cotton fabric
- Wax
- Dye
- Brush
- Canting tool
- Pot for boiling water
- Clothesline
Steps
- Choose your design: The first step in making kain batik is to choose your design. Traditional batik designs are usually geometric or floral patterns. You can either draw your own design or use a pre-made one.
- Prepare the fabric: Before you can apply the wax, make sure that the fabric is clean and dry. You can use any type of cotton fabric for batik, but make sure it is not too thin, so it can absorb the color and wax.
- Apply the wax: Once you have your design, you need to apply wax to the fabric. Wax will prevent the dye from penetrating certain areas of the fabric, creating the pattern. You can use a brush or a canting tool to apply the wax. Be sure to cover all the areas you want to remain white.
- Dye the fabric: After the wax has dried, you can dye the fabric. You can use any color you like. The fabric will absorb the dye in all the areas that are not covered in wax.
- Dry the fabric: After the fabric has been dyed, you need to let it dry completely. Hang it up on a clothesline or lay it flat on a clean surface.
- Apply more wax: Once the fabric is dry, you can apply more wax to certain areas if you want to add more colors or patterns.
- Dye the fabric again: After you have added more wax, you can dye the fabric again with a different color. The areas that were covered in wax before will remain the same color.
- Repeat steps 5-7: You can repeat steps 5-7 as many times as you like, depending on how many colors and patterns you want to add.
- Remove the wax: Once you are satisfied with the colors and patterns, you need to remove the wax. You can do this by boiling the fabric in water. The wax will melt and float to the top of the water. Be sure to rinse the fabric thoroughly afterwards.
- Dry the fabric: After the wax has been removed, you need to let the fabric dry completely.
- Iron the fabric: Once the fabric is dry, you can iron it to remove any wrinkles.
- Use the fabric: Your kain batik is now ready to be used! You can turn it into a dress, a shirt, or any other type of clothing or accessory.
Making kain batik is a time-consuming and challenging process, but it is also a fun and rewarding experience. It allows you to express your creativity and create something beautiful that you can wear or use. While it may take some practice to master the technique, the end result is well worth the effort. So why not give it a try and see what you can create? With a little patience and creativity, you can make your own piece of traditional Indonesian fabric.